Homemade bath bombs are an easy way to turn bath time into a luxurious spa day right at home. Learn how to make bath bombs with all-natural ingredients, skipping the additives commonly found in store-bought versions.
Not only are they fun to make for your own self-care routine, they also make great gifts for loved ones that could use a little TLC.
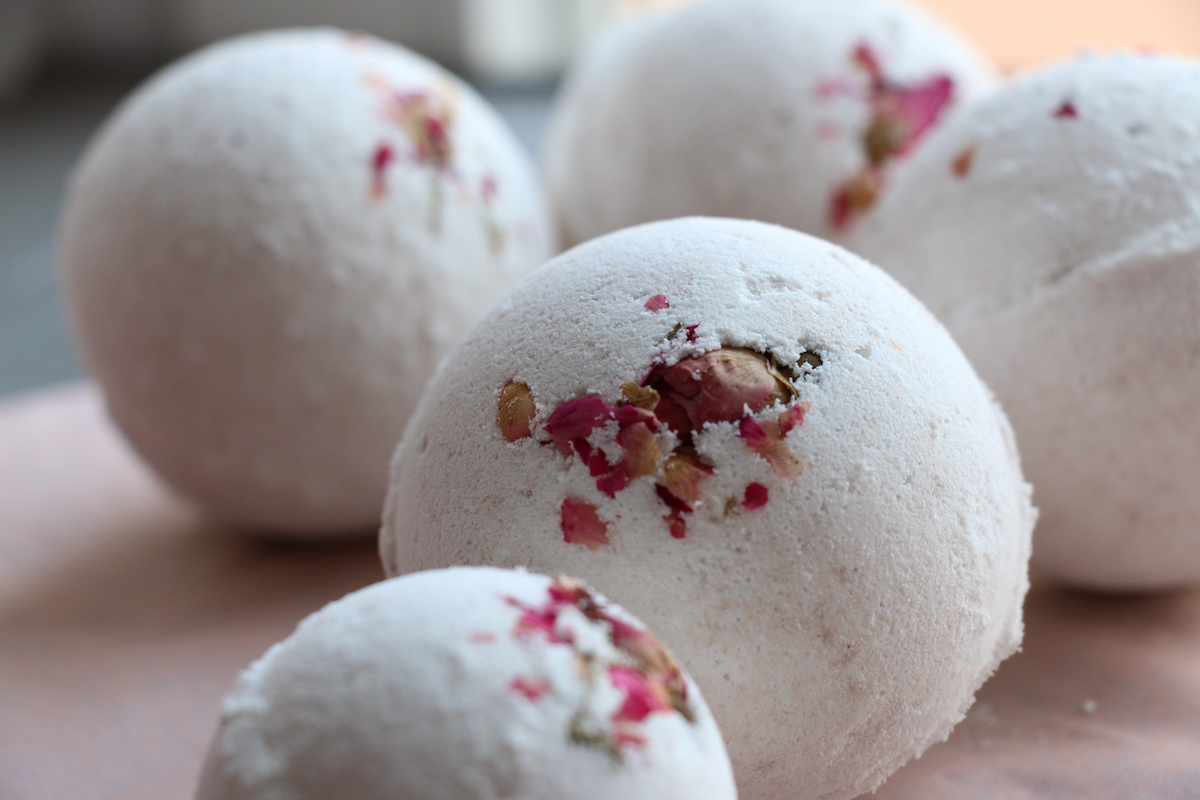
Homemade bath bombs with roses
Homemade body products are some of my daughter’s favorite crafts, and she absolutely loves spending afternoons crafting homemade lotions, body butters, soaps and salves with me in our kitchen.
Every time we make something together it turns into two separate mommy-daughter dates. First, there’s crafting time together, but then we both know that a spa date is in our near future.
When she saw bath bombs at a store in town, she immediately started planning our next craft.
Homemade bath bombs are incredibly easy to make at home, and they’re one of the easiest homemade body products we’ve made to date. They can be the perfect project for a girls night in, a fun craft with the kids, or just a great way to make something nice for yourself or those you love.
They can be made to add plain fizz to a tub, or you can add in botanicals and turn them into a tool for herbal self-care. Choose the right herbs and they’ll help with skin issues, muscle aches, and even tension headaches.
What are Bath Bombs?
Bath bombs are, essentially, a means to turn an ordinary soak in the tub into something special.
Essential oils, body butters (and any other moisturizing ingredients), and dried herbs or flower petals are all pressed into a single ball, ready to be transformed into an instantly fizzy spa-in-one as soon as it hits the water.
The thing about store-bought bath bombs is that they’re expensive, and often contain dye, too much fragrance, and (worst of all), glitter — which, as everyone knows, will live on much, much longer in towels, clothing, and on the skin — than the duration of any bath.
I started making my own bath bombs once I realized a)how few ingredients and pieces of equipment I’d need and b)that I could tailor each batch to suit my skincare needs (or the needs of anyone else who might be receiving them as a gift).
The much-desired fizzing effect of bath bombs is due to an acid-base reaction, usually between citric acid and baking soda, which are the two main ingredients in both homemade and store-bought bath bombs.
When a bath bomb is tossed into the tub, the chemicals react, causing a cascading explosion of fizzy bubbles filled with carbon dioxide.
Ingredients for Bath Bombs
If you’re someone who enjoys making other types of skincare remedies at home, you might have some of these ingredients on hand already. Shea butter is commonly used as a base, because it’s nourishing to skin and readily available in the skincare aisle of most stores.
Mango butter, coconut oil (or any other favorite base oil) can be substituted for the shea butter, if you prefer.
Choose a single essential oil or a blend, or you can leave it out completely for a minimally-scented bath bomb.
- Citric Acid ~ The acidic part of the acid-base reaction that creates a fizz in the tub.
- Baking Soda (Sodium bicarbonate) ~ To react with the citric acid.
- Sea Salt ~ Eases sore muscles, conditions skin and helps distribute the citric acid and baking soda.
- Shea butter or Coconut Oil – Nourishes skin and helps bind the bath bomb together.
- Natural colorant (such as clay) or herbal powder ~ Optional
- Essential oils ~ Optional
- Witch hazel in a spray bottle ~ To gently moisten the ingredients just enough to bring them together into a cohesive bath bomb.
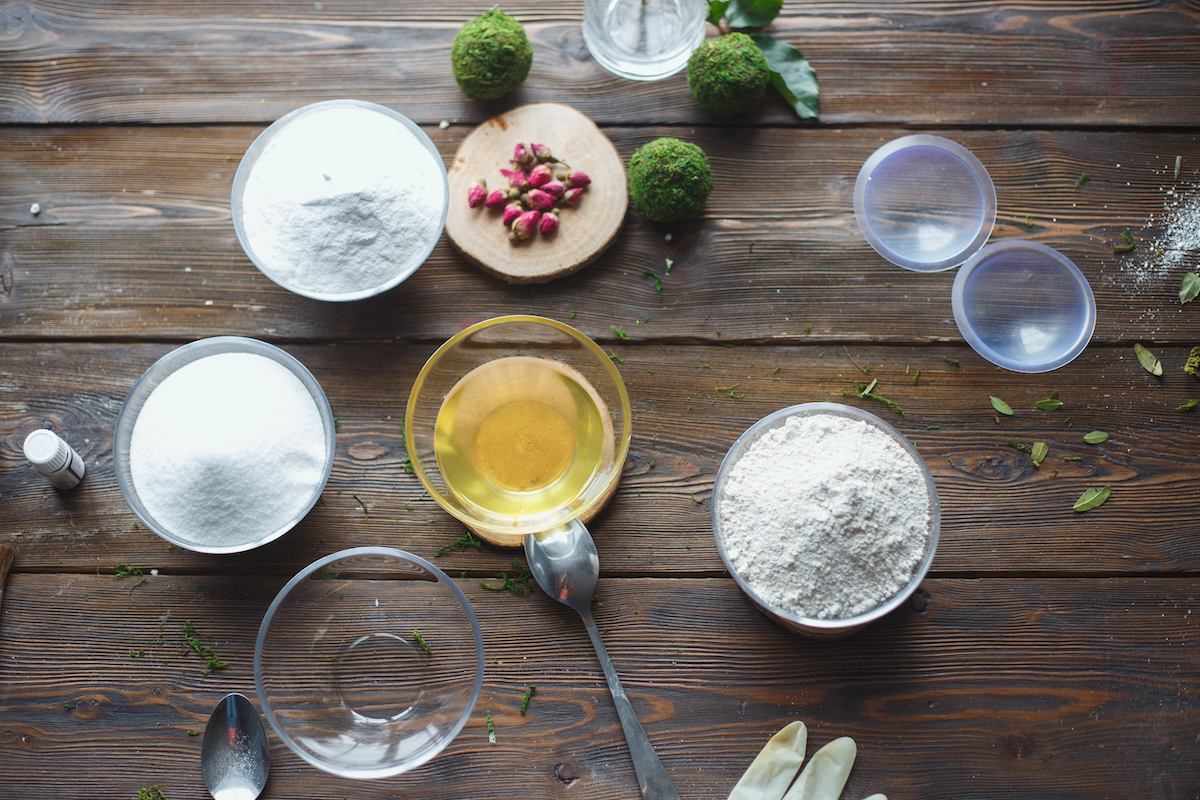
Ingredients for Bath Bombs including citric acid, baking soda, melted shea butter and bentonite clay.
Equipment for Making Bath Bombs
The actual items needed to make homemade bath bombs are fairly straightforward, with the molds themselves being the only required piece of specialty equipment (and even then, you can make very sweet little bath bombs using measuring cups).
They make both metal and plastic bath bomb molds, which come in sets of two, and have them in a couple of different sizes. I like to buy them in multiple sets so that you can pack a few bath bombs at a time.
Another option is to use silicone soap molds instead of metal molds. It can be a bit trickier to remove the hardened bath bomb mixture from a soft mold, but silicone is a great choice if you want the bath bombs to be something other than sphere-shaped.
Along with the molds, the other pieces of equipment you may need to make bath bombs are:
- Measuring cups and spoon
- Digital food scale
- Mixing bowls
- Mesh sieve
- Whisk and spoon
Beyond that, you might want gloves too. They real are optional as everything here is obviously skin safe, but if you’re using essential oils your hands will be scented for days. Not necessarily a bad thing depending on the fragrance, but something to keep in mind. Gloves also make cleanup a bit easier.
Lastly, you may want a food processor, coffee grinder or mortar and pestle to grind dried herbs and flower petals if you’re using those.
Fragrances
For me, the best part about making my own bath bombs is the control I have over the fragrance.
I don’t know about you, but I’ve definitely been gifted bath bombs in the past that have been scented with way too much perfume. There are many, many essential oils you can add, but these are some of my favorites:
- Chamomile: soothing properties; good for rash, eczema, or other itchy skin conditions.
- Cedarwood: sinus-clearing and calming properties; used for acne-prone skin and dandruff.
- Lavender: calming and stress-relieving properties; helps fungal skin infections and other wounds.
- Rose: anxiety-reducing properties; relieves PMS and menstrual pain.
- Eucalyptus: decongestant/expectorant properties; helps clear phlegm due to cold and flu.
- Ylang ylang: anxiety-reducing properties; used to relieve feelings of stress and anxiety.
- Peppermint: energizing properties; soothes sore muscles, sinus congestion, and headaches.
Once you start combining essential oils, there are quite literally thousands combinations to be made.
As with any project involving the topical application of essential oils, I always advise a patch test before you begin making bath bombs. It’s always possible to have a reaction to new skincare ingredients, and it’s better to test on a small spot…before climbing into a tub full!
Colors
Adding color to handmade bath bombs is fairly straightforward, depending on the materials used. To color the bath bombs naturally, without the use of dyes, I suggest using natural dry clay that has been ground up to form a powder.
Like other natural dyes, the color won’t be as vivid as it would be if a chemical dye was being used, but it can turn the bath bomb a lovely pastel color while adding the skin-enriching properties of clay.
Some examples of skin-friendly clays are:
- Gray bentonite clay: Adds light gray color; clay is from volcanic ash and is a good option for oily skin.
- Rose kaolin clay: Adds soft pink color; good option for sensitive or dry skin.
- Brazilian clay: Comes in a variety of natural shades; good option for all-purpose bath bombs.
- French green clay: Adds light green color; good option for oily skin.*
*Some types of clay are a rich source of oxides, which add color and are great for oily or blemish-prone skin. Some types of clay have a notable smell because of their mineral content. Give them a sniff before adding, and if you don’t like the smell then don’t add them, as they’ll add that scent to the bath.
If you’re not up to fussing with clay or you want more vibrant colors, you can also add skin safe bath bomb colorants, which come in 30+ shades.
Pro Tip: Avoid using activated charcoal to color bath bombs, it just makes a mess!
Skin Conditioners
There are a few options for added skin conditioners when making your own bath bombs, keeping in mind the fact they’re added in fairly small amounts so the ingredients will be quite diluted the bath bomb is introduced to the tub.
I like to incorporate skin conditioners when I know I’ll be gifting the bath bombs, it makes them feel like even more of a special treat for my family and friends.
- Bee pollen: Adds antioxidants and a cheerful yellow color; grind into a fine powder before adding.
- Honey powder: Softens skin and helps heal damaged complexions.
- Oatmeal powder: Always a good addition to any bath; soothes dry and itchy skin.
- Milk powder (cow or goat): Helps exfoliate dry skin and ease inflammatory skin conditions.
Herbal Bath Bombs
Adding whole or ground dried herbs and flowers to homemade bath bombs not only looks lovely, especially for gifts, it can also impart any soothing or medicinal properties the plants might have.
You’ll only need 1 to 2 teaspoons of dried plant matter per batch; I like to grind the herbs in a spice grinder or in a mortar and pestle for a looser appearance. There are plenty of herbs to choose from, just make sure the plants haven’t been sprayed.
The herbs linked to below are all organic, and they’re pre-powdered so they’re perfect for incorporating into homemade bath bombs:
- Calendula: Flower petals; good for any type of skin condition.
- Chamomile: Flower petals; soothes itchy skin.
- Pine: Ground or chopped needles; opens breathing passage and soothes sore muscles.
- Lavender: Flower petals; calming and helps induce sleep.
- Rose: Flower petals; has astringent properties and is beneficial for irritated skin.
- Rosemary: Ground or chopped needles; helps increase circulation and has antiseptic properties.
Generally, powdered herbs are added into the bath bomb mixture with the other dry ingredients. You can also add whole dried herbs or flowers directly into the bath bomb molds before filling, and this will result in a lovely decoration on each one.
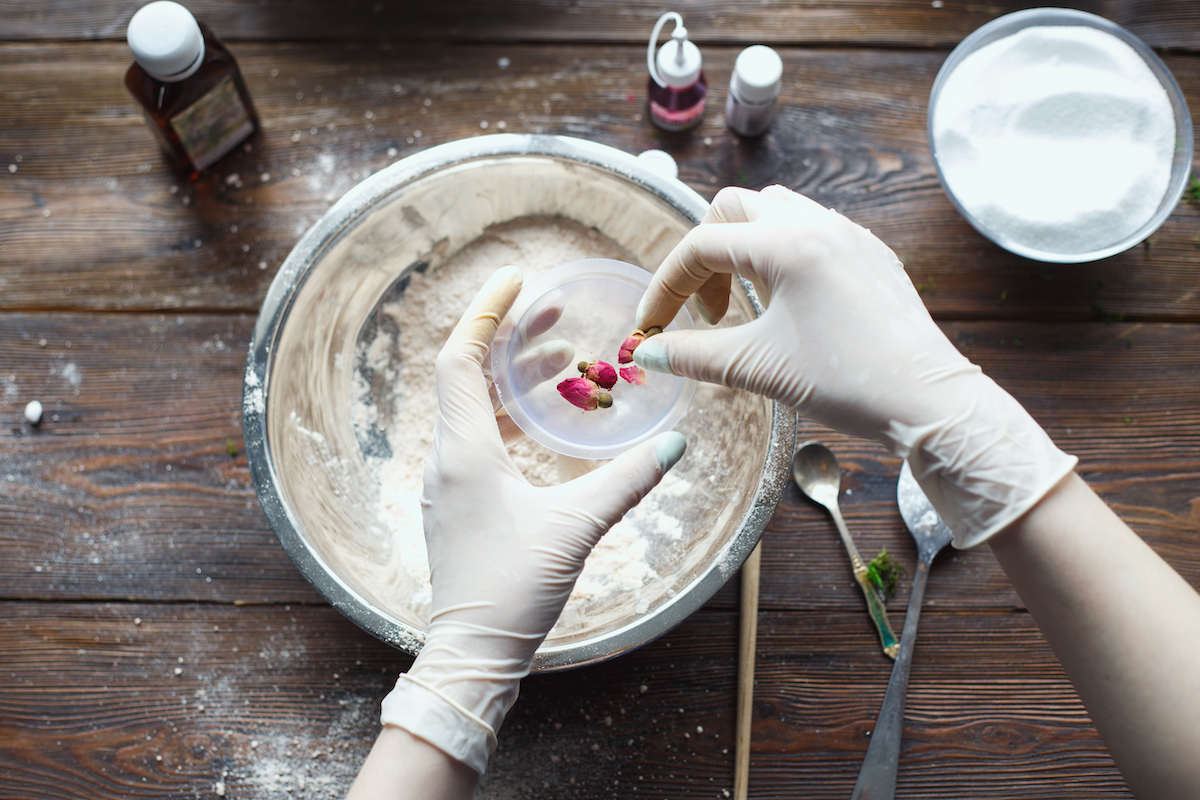
Adding roses to bath bomb molds before filling.
How to Make Bath Bombs
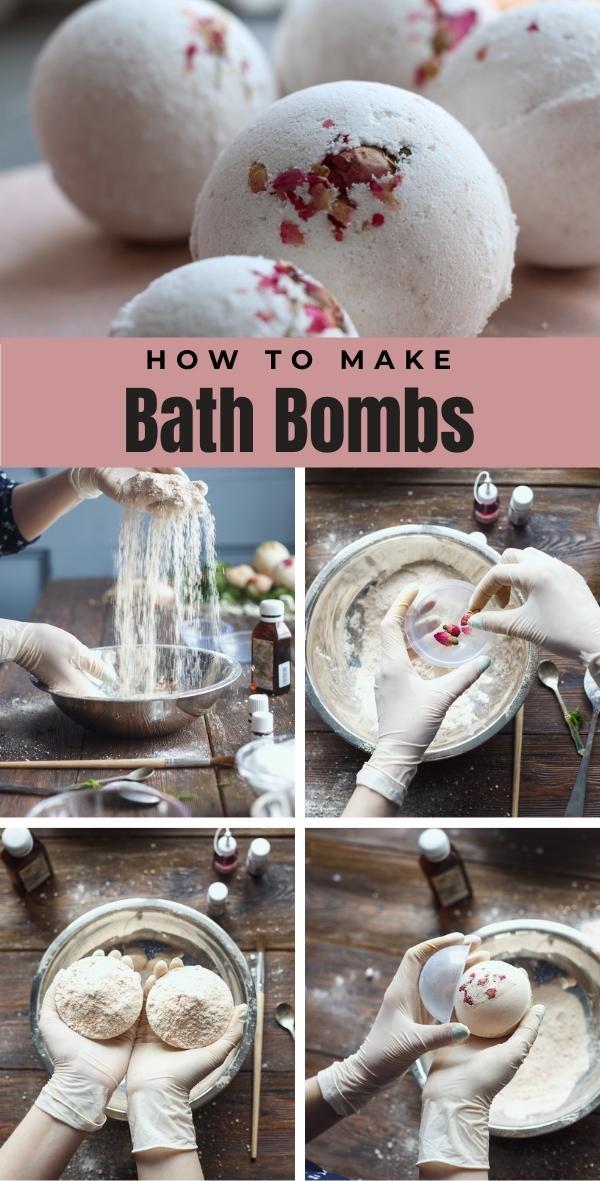
To make a set of 5 bath bombs at home, begin by sifting the baking soda, citric acid, and sea salt together into a large mixing bowl. I like to use a mesh sieve, but if your dry ingredients aren’t too clumpy you can just work everything into a fine powder with your fingers.
In a smaller bowl, gently stir together the melted shea butter (or mango butter or coconut oil, depending on what you’re using) with the essential oil, natural colorant, and herbal powder (again, depending on the ingredients you’ve chosen).
Slowly drizzle the melted oils and butter over the dry mixture, using your fingers to incorporate the wet and dry ingredients together into a uniform combination (there shouldn’t be any lumps or clumps when you’re finished).
It’ll still be quite powdery at this point.
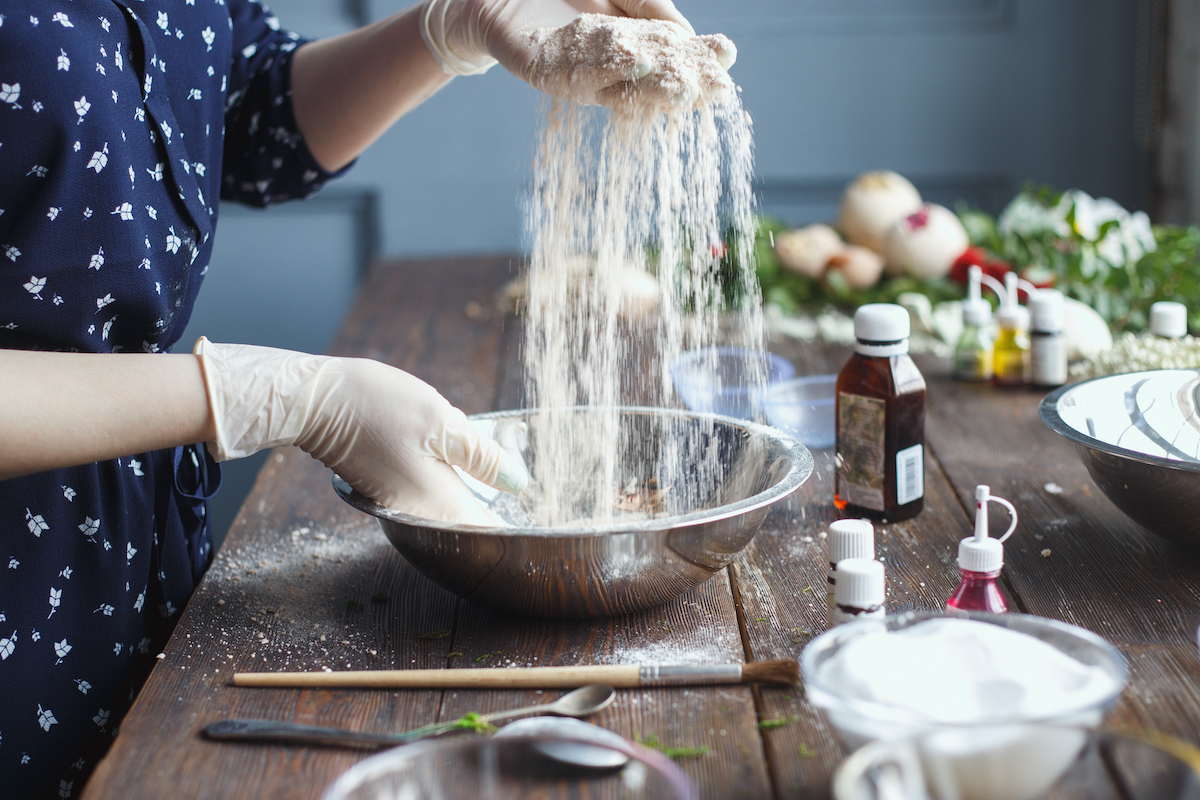
Mixing ingredients for bath bombs
Once the mixture is totally mixed together, try packing a small ball into your hand. If the ball crumbles, add it back to the main bowl and spray 2 or 3 times with witch hazel. Try making a small packed bowl again, repeating until the mixture holds its shape.
Try not to overly dampen the mixture, it should stay as dry as possible throughout the process.
When you add witch hazel with the spray bottle you’re causing a very small portion of the baking soda and citric acid to react. That reaction helps the mixture stick, but if you add too much liquid it’ll turn into a fizzy mess on the counter (instead of a lovely fizzy tub later). Less is more here.
When the mixture is ready, lightly pack the bath bomb molds to the point that the molds are slightly overflowing.
Press two molds together, avoid twisting them to make them stick, and remove any excess bath bomb mixture from the sides of molds. If the contents of the mold refuse to stick, simply add everything back to the bowl and try again after 1 to 2 more spritzes of witch hazel.
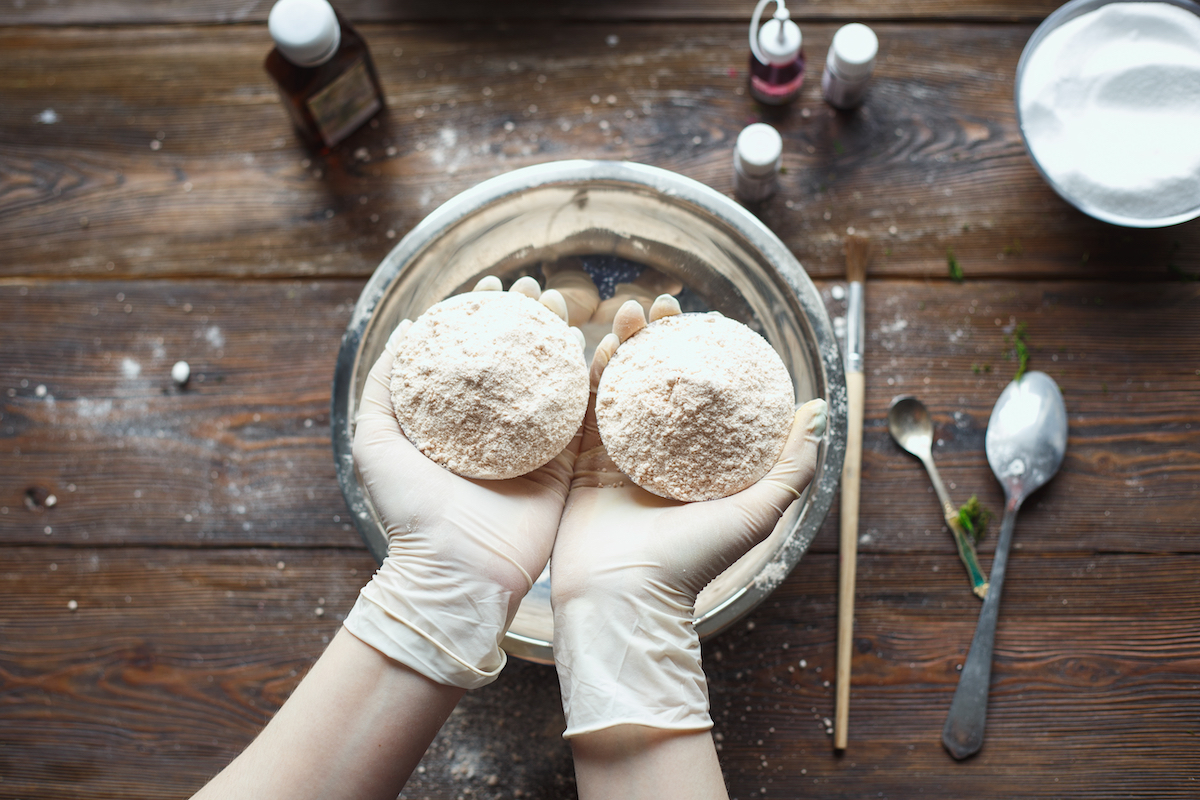
Using bath bomb molds
To remove the bath bomb from its mold, give the top mold a light tap and carefully remove it. Let the bottom half sit for another 15 minutes in its mold, and then repeat the tapping and removal of the bottom mold.
Carefully place the bath bombs on a soft towel, this will help keep them from crumbling as they dry.
Let them sit and air dry for 24 to 48 hours before using or gifting. Homemade bath bombs should be used within 4 to 6 months.
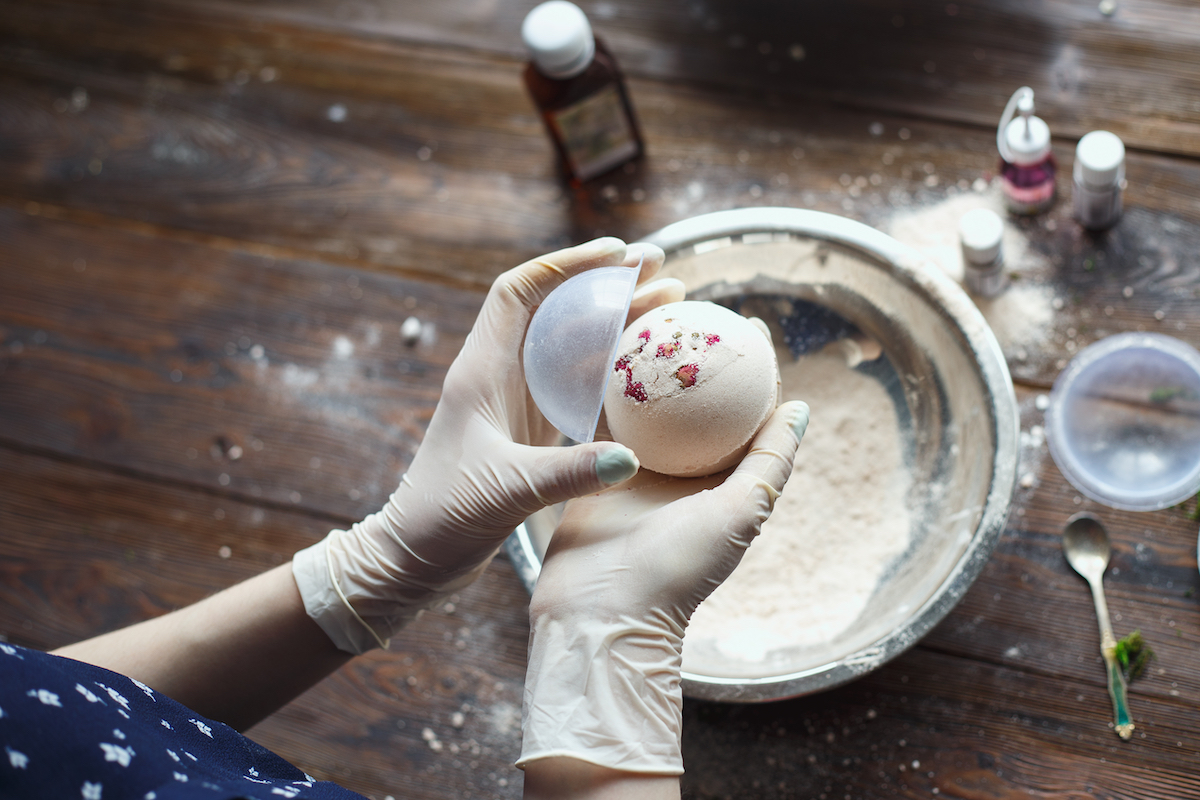
Making bath bombs
Troubleshooting Homemade Bath Bombs
Successful bath bomb-making is more likely to occur when you’re working in a not-too-wet environment; it’s very difficult for the bombs to harden and cure if you live in a damp or humid climate.
However, since many of us live at least part of the year in these conditions, there are a couple of workarounds to this problem:
- Set up a dehumidifier by your crafting space.
- Let the bath bombs harden in their molds in a still-warm oven. Preheat the oven to between 150° F and 170° F, then turn it off. Prepare the bath bombs as called for in the recipe below and remove the top mold only. Place the bath bombs, still in their bottom molds, on a cookie tray lined with a clean dishtowel and keep the oven door ajar and the light on. Check the bath bombs every 4 to 5 minutes and flip them into the other mold, giving each bath bomb direct access to the warm dry it at timed intervals. The bath bombs will begin to stick to the molds after 20 minutes, so be sure to carefully remove before allowing to cure for 24 to 48 hours as described below. (A food dehydrator also works for this, if you don’t want to use your oven.)
- Bath bombs made with coconut oil or shea or mango butter (or any other oil or butter that hardens at cool temperatures) can be placed in the refrigerator for several hours immediately after being un-molded.
Cracking
Cracking is a common problem when popping homemade bath bombs out of their molds, and is typically a sign that that the mixture was too wet or too dry. If the mixture is too wet, it can crack as it dries and expands; in which case, try adding less witch hazel next time.
If your work area is dry and warm (say, from indoor heating), the bath bombs could dry too quickly and crack.
Crumbling
If your bath bombs are crumbling, it’s most often a sign that the mixture was too dry. This can be remedied by adding more oil, butter, or witch hazel to the recipe.
Alternatively, crumbling can occur when the mixture is packed too tightly or not tightly enough into the mold or measuring cup. I find that the latter is more likely to happen with bath bombs that were made at the end of the batch, when there isn’t enough of the mixture to completely fill a mold.
Soft Texture
If, after 24 hours, your bath bombs have failed to completely harden, the culprit is probably too much moisture (usually in the form of excess oil or butter). Try using less of these ingredients the next time you make bath bombs.
If you live in a humid climate, try plugging in a dehumidifier next to your work station.
Flat Bottoms
Bath bombs that are made in a mold can end up flattened on the bottom if they aren’t given enough time to harden or if too much witch hazel has been added. Give each bath bomb a solid 15 minutes to harden in the mold, which will help them hold their shape once removed from the mold.
After the allotted time is up, carefully place the hardened bath bombs on a clean towel to finish curing, to prevent crumbling.
Uneven Surface
A lumpy or bumpy surface on bath bombs is usually due to not mixing the ingredients thoroughly before adding them to the mold. Just like when you’re baking, all the dry ingredients should be sifted together before incorporating the wet ingredients.
Bath Bomb Recipes
Now that you understand the basic process for making bath bombs at home, try your hand at any of these simple bath bomb recipes:
- Lavender Bath Bombs
- Cedar and Spruce Bath Bombs
- Rose Milk Bath Bombs
- Chamomile and Hibiscus Bath Bombs
Beyond bath bombs, you can use these same ingredients to make shower steamers, like these Eucalyptus shower bombs that help with respiratory congestion.
If for some reason you just can’t get the bath bombs to hold shape, no worries, you can just create fizzing bath powder instead.
How to Make Bath Bombs
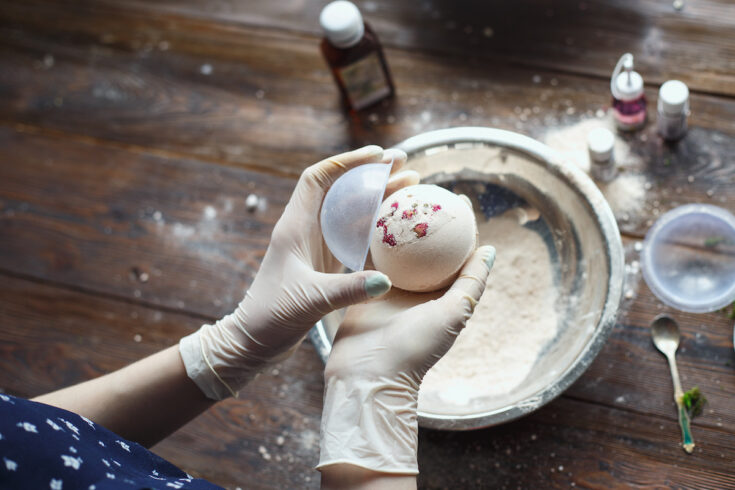
A basic bath DIY bomb recipe and easy-to-follow method with endless options for customization.
Materials
Tools
- Bath Bomb Molds
- [Spray Bottle]
Instructions
- Mix or sift together the baking soda, citric acid, and sea salt in a medium bowl. Break up any visible lumps with your fingers.
- In a smaller, separate bowl stir the melted shea, coconut, or mango butter with the natural colorant, herbal powders, and/or essential oil (if using) together.
- Drizzle the melted oils over the dry mixture, stirring with a whisk the entire time. As you work, break up any clumps with your fingers.
- When the ingredients are completely incorporated, try squeezing a small handful of the mixture into a ball using your hands. If it crumbles, add it back into the main mixture and spray with 2 or 3 spritzes of witch hazel; give it another stir and try to make it into a ball again. Repeat this step until the mixture holds its shape without crumbling.
- Fill the bath bomb molds with the mixture, adding extra (the molds should be overflowing) and lightly packing the molds as you work.
- Press the molds together firmly without twisting. Use your fingers to remove any excess bath bomb mixture that spills out of the side.
- Lightly tap each mold and carefully remove the top mold. Leave the bottom mold where it is, giving it another 15 minutes before removing it.*
- Place the finished bath bombs on a soft towel and allow them to air dry for another 24 to 48 hours. Use within 4 to 6 months.
Notes
*If the two halves don't stay together, put the mixture back in the bowl and add 1 or 2 more spritzes of witch hazel and stir. You may that you need to add more witch hazel throughout the keep the mixture damp enough to be workable.
Bath Bomb Variations:
For an ultra-fizzy bath bomb: Omit the sea salt, use 1 cup citric acid total.
For a mango/shea butter-less bath bomb: Use 2 tablespoons oil (such as almond or olive oil) instead of butter.
Natural Body Care Recipes
Looking for more all-natural homemade body products?
- Homemade Herbal Shampoo Recipe
- Easy Melt and Pour Gardeners Hand Soap
- Calendula Cream
- Yarrow Salve
- Rose Hip Lip Balm
Leave a Reply