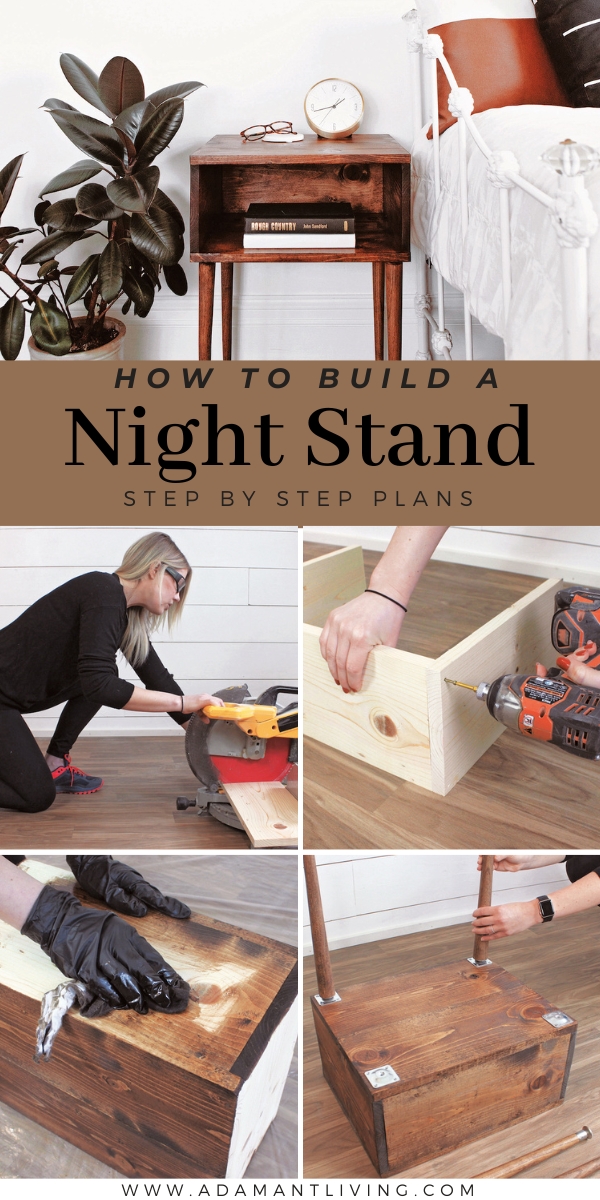
Building a nightstand is a simple project, and it can be done in just a few hours with minimal equipment. This small piece of homemade furniture can make a big difference in your day (and night), so it’s well worth the effort.
A nightstand is just a small piece of furniture, but try going to bed without one. Where do you put your lamp, book, water bottle, glasses, or any number of other things that you need easily at hand while you sleep?
Though simple, it can be tricky to figure out the exact dimensions yourself. That’s where these easy DIY plans for a nightstand come in. They’re right out of the book One-Day DIY by JP Strate & Liz Spillman.
The plans whey walk you through everything you need to build a nightstand in just a few hours.

Reprinted with permission from One-Day DIY by JP Strate & Liz Spillman. Page Street Publishing Co. 2020. Photo credit: Kate Becker, JP Strate & Liz Spillman. It has been edited slightly for format and length to fit the web.
DIY Nightstand Plans
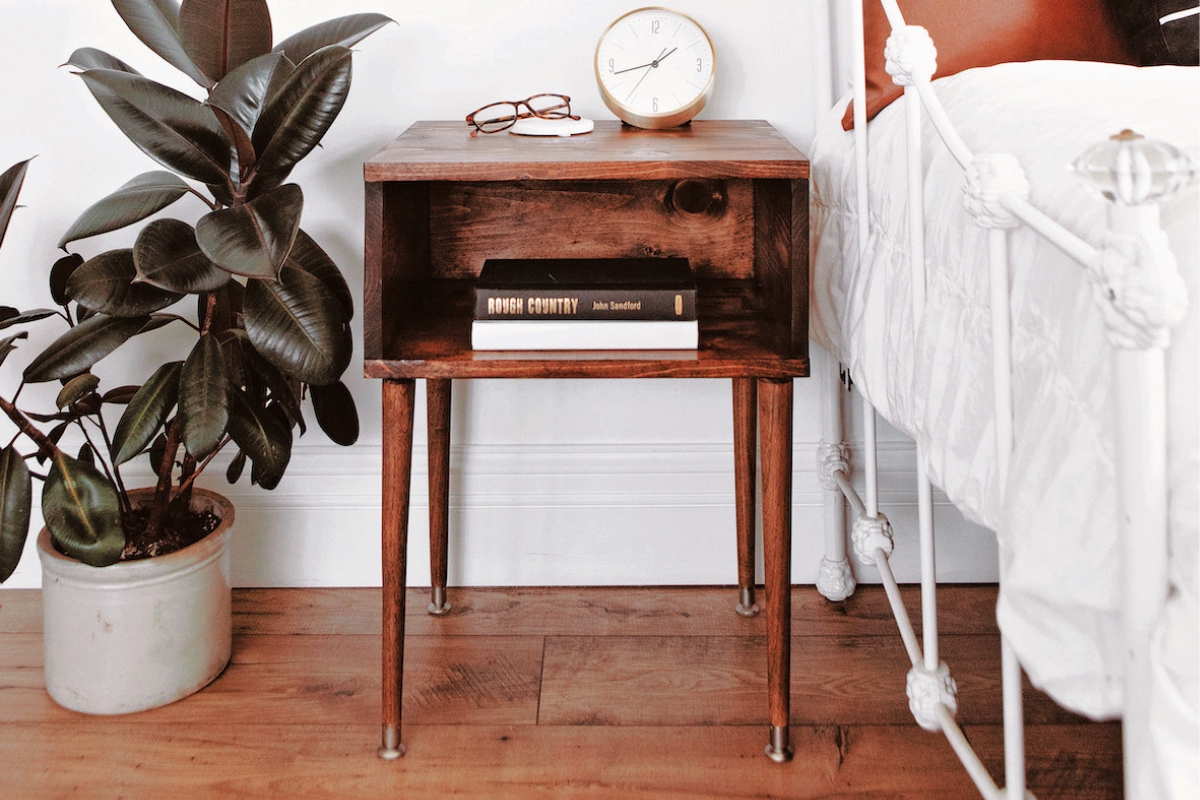
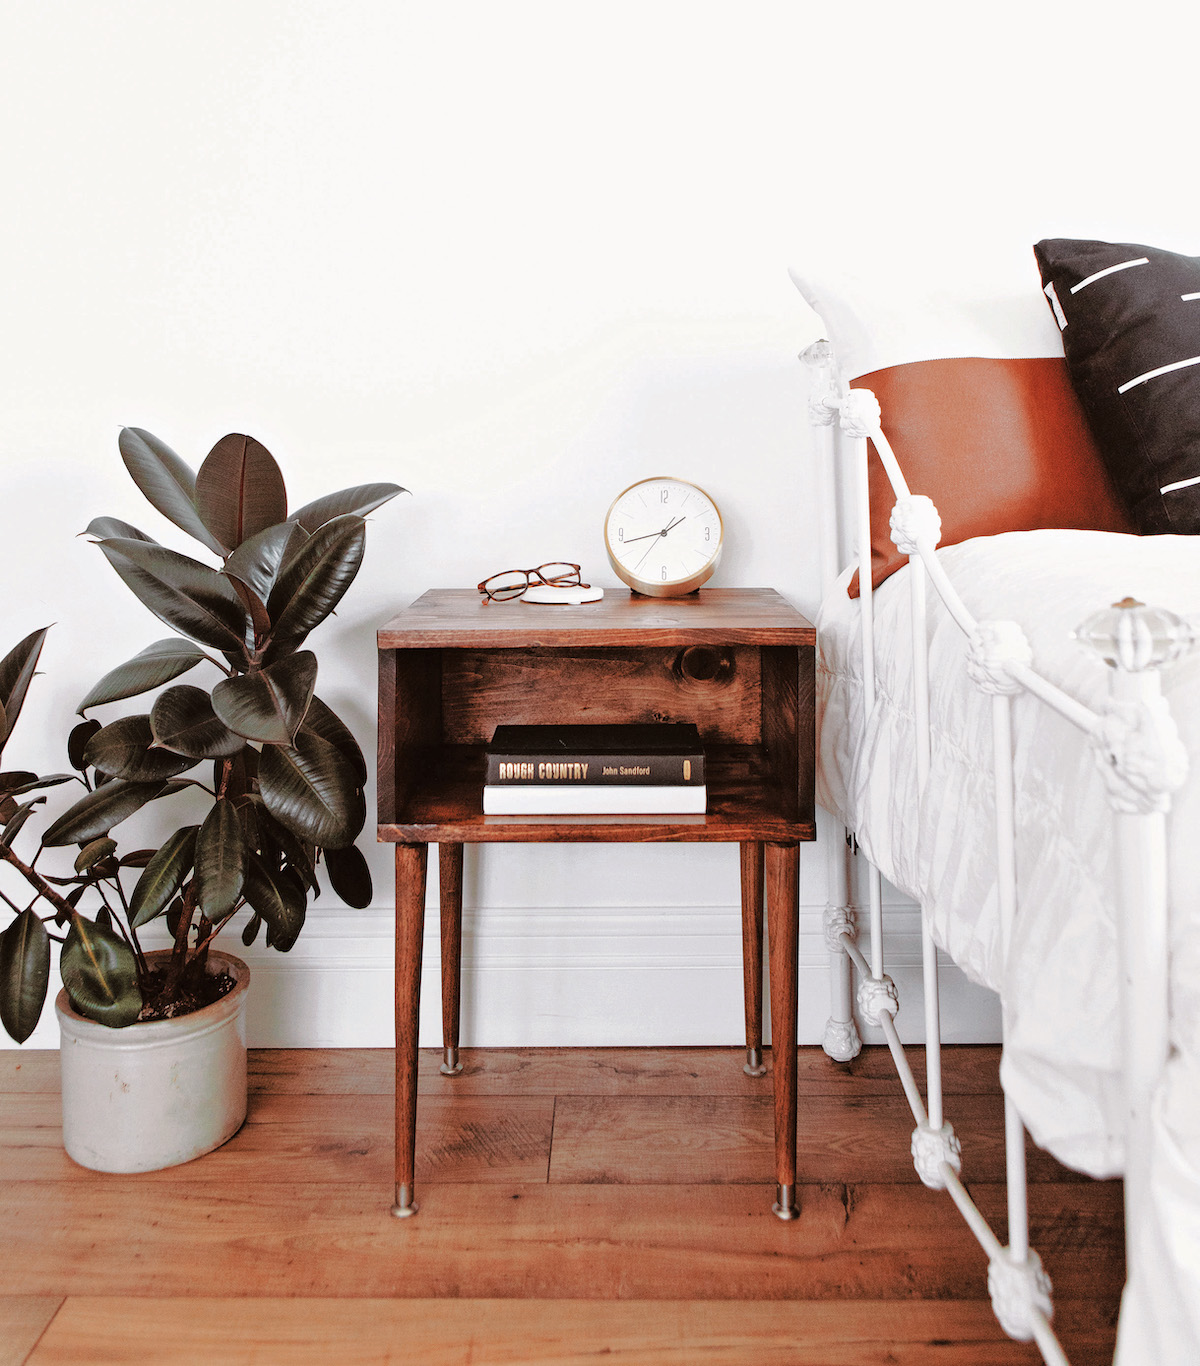
We’re suckers for modern furniture design. The clean lines, the fun legs, we love it all. We designed this simple nightstand to give off that modern feel, while still being functional. It’s versatile enough to fit with any bedroom style, but we’re partial to pairing it with the Dreamy Headboard.
Because of its size and simple design, we recommend keeping the decor light—after all, the fewer distractions you have in your bedroom, the more relaxed you’ll feel.
Dimensions
24 3⁄4″ H x 18″ w x 14 1⁄2″ d (62.9 cm x 45.7 cm x 36.8 cm)
Tools and Equipment
Lumber (Standard White Pine): 1 x 8, 10′ (3 m) long (x1)
Tape measure
Pencil
Safety glasses
Miter saw
Drill
11⁄2″ (3.8-cm) trim-head screws
Screwdriver or impact driver
Wood filler (to match your stain color)
Sanding block or sander
Drop cloth
Rubber gloves
Rag
Stain
Brush
Polyurethane
4 table leg straight-mounting T-plates with screws
4 (16″ [40.6-cm]) round taper legs
How to Build a Nightstand
The equipment is relatively simple and straightforward, and so is the process.
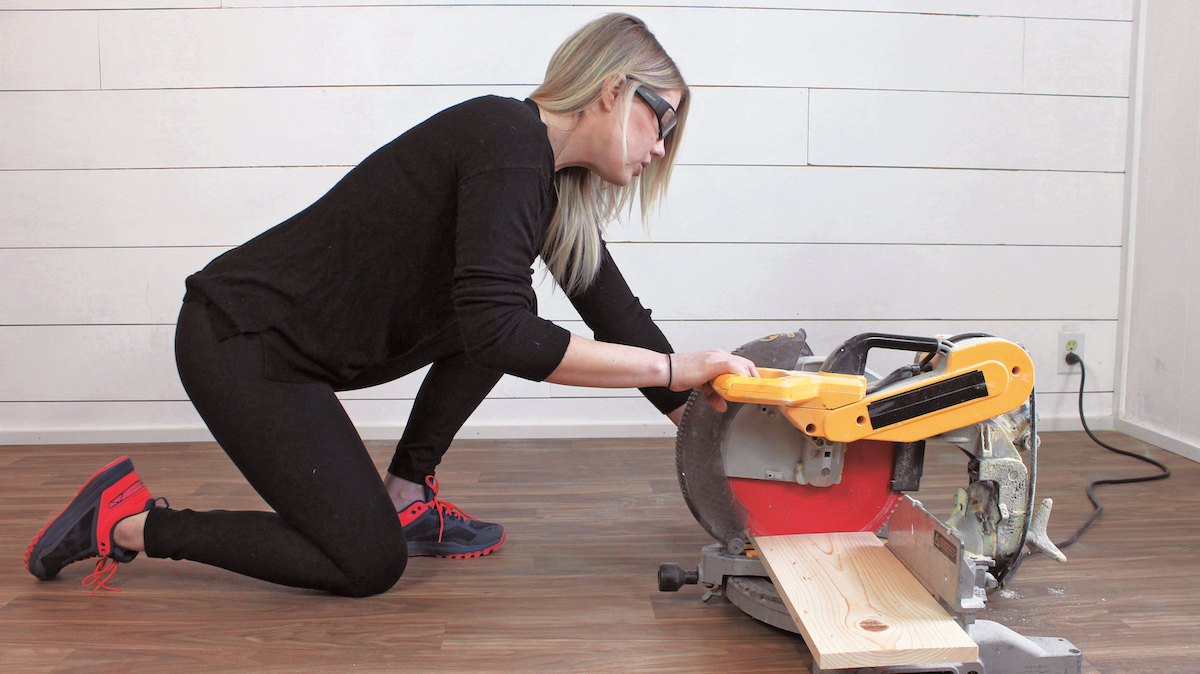
STEP 1
Grab your tape measure and pencil and mark off the cuts of lumber you’ll need for this project as described below. Make sure to put on your safety glasses and use your miter saw to make the necessary cuts. If you don’t have a miter saw, many larger home improvement stores will cut the pieces for you.
Cut the 1 x 8 into four 18″ (45.7-cm)-long pieces, two 14 1⁄2″ (36.8-cm)-long pieces and one 16 1⁄2″ (41.9-cm)-long piece.
STEP 2
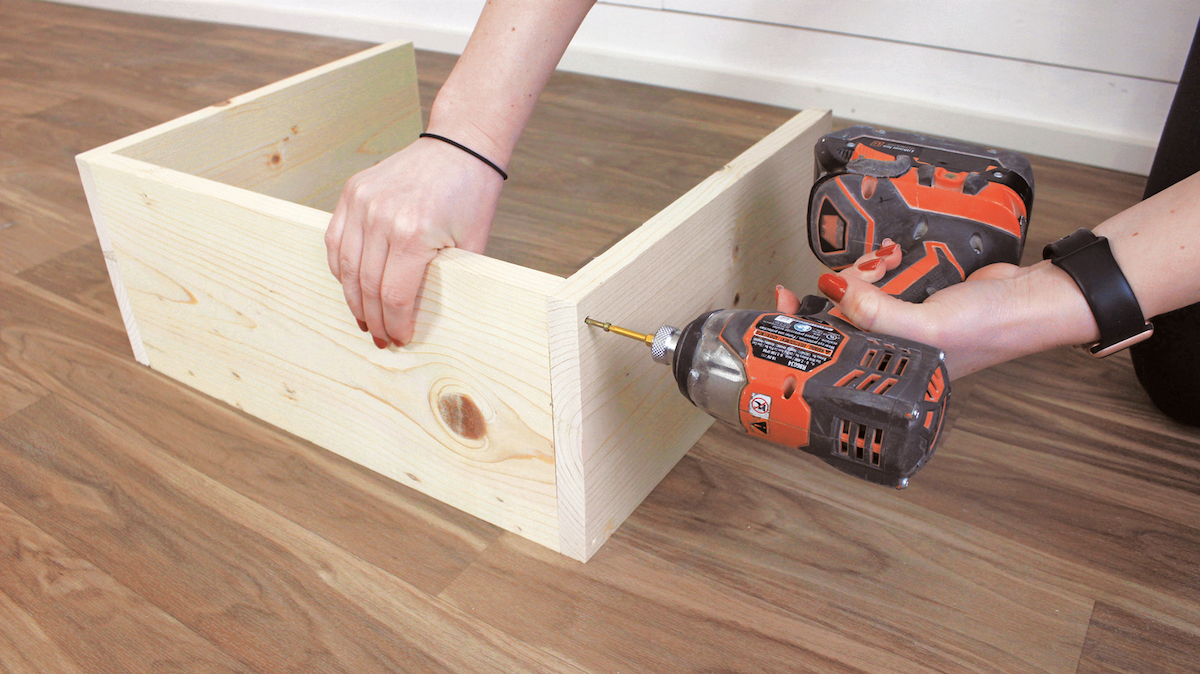
Lay your 16 1⁄2″ (41.9-cm) piece on edge with a 14 1⁄2″ (36.8-cm) piece on either side to form a “U” shape.
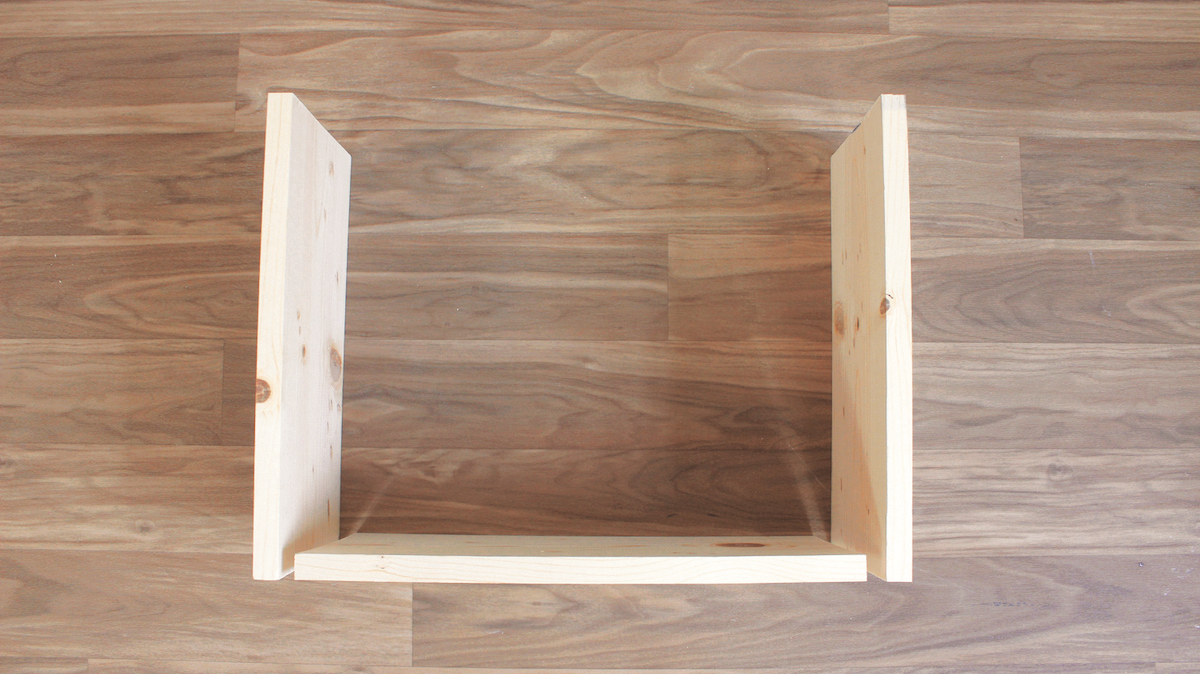
STEP 3
Predrill two holes through each 14 1⁄2″ (36.8-cm) piece into the 16 1⁄2″ (41.9-cm) piece at each corner.
Secure the “U” framework together with a trim-head screw in each pre-drilled hole.
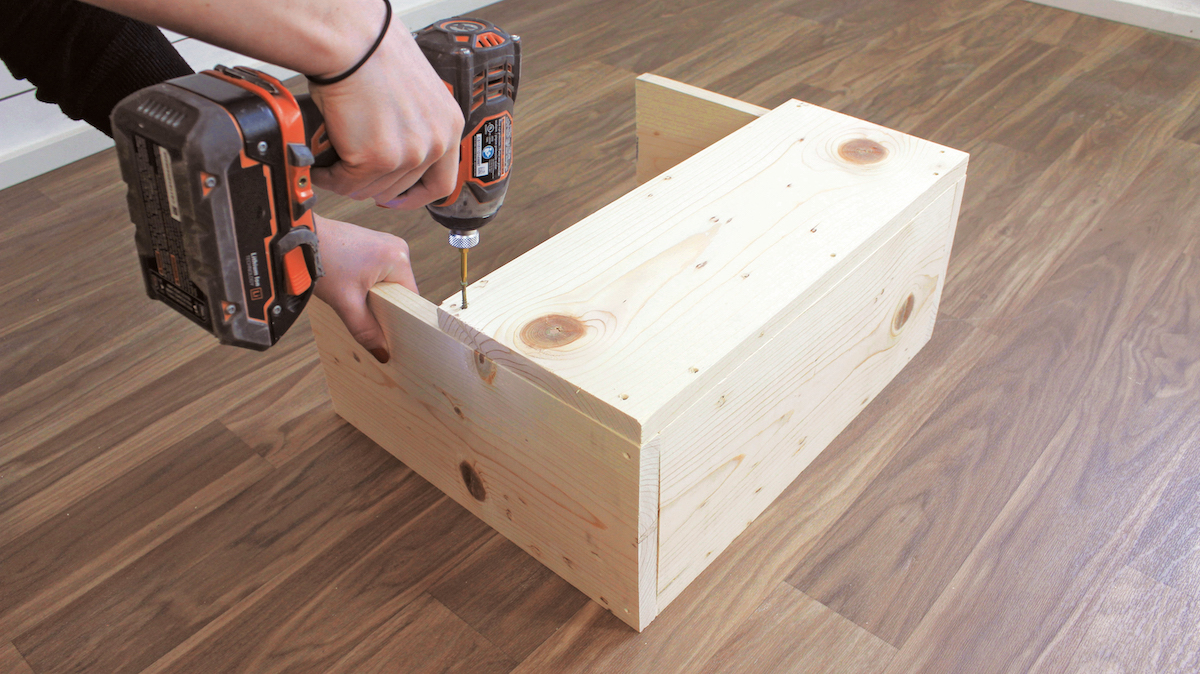
STEP 4
Lay an 18″ (45.7-cm) piece across the top so it’s flush with the edges of your “U.” Predrill seven holes total evenly spaced through the 18″ (45.7-cm) piece into the “U” underneath, two into each 14 1⁄2″ (36.8-cm) piece and three into the 16 1⁄2″ (41.9-cm) piece.
Secure the 18″ (45.7-cm) piece with a trim-head screw in each pre-drilled hole.
STEP 5
Take a second 18″ (45.7-cm) piece and lay it flush against your first 18″ (45.7-cm) piece.
Predrill two holes at the corners on each side of the 18″ (45.7-cm) piece into the 14 1⁄2″ (36.8-cm) pieces underneath. Secure the 18″ (45.7-cm) piece with trim-head screws.
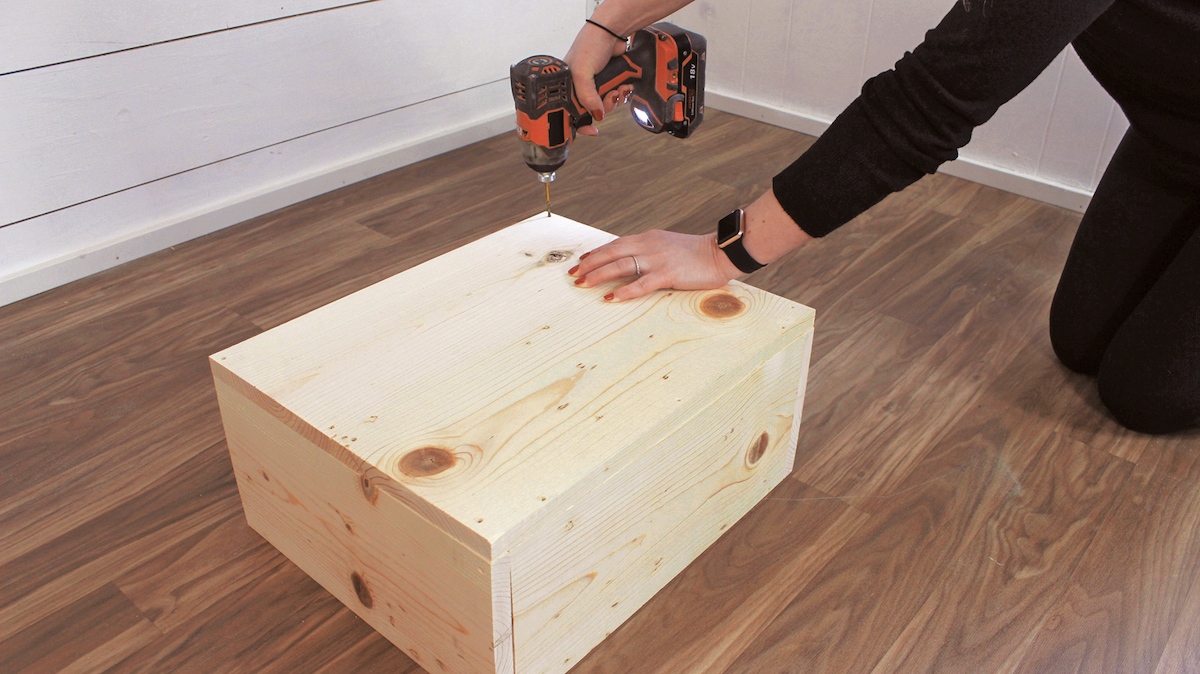
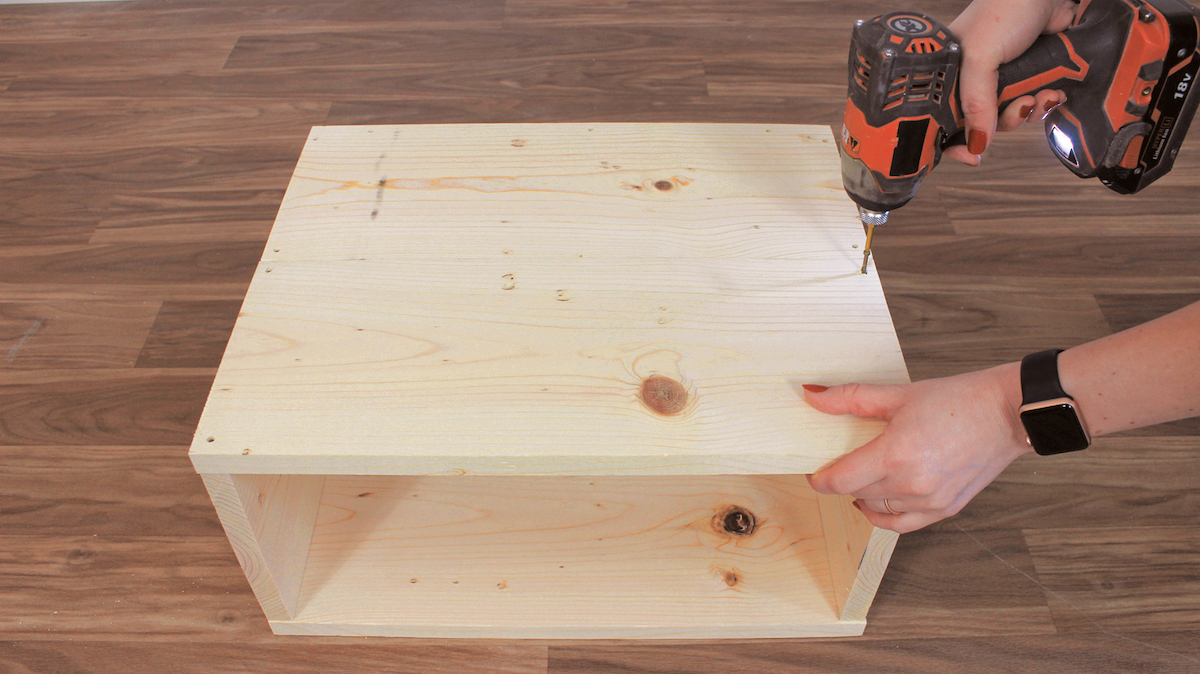
STEP 6
Flip your nightstand over and repeat Steps 4 and 5 with your remaining two 18″ (45.7-cm) pieces to complete the framework.
STEP 7
Dip your fingertip into your wood filler and cover up any exposed screw holes.
Once it dries completely, take your sanding block or sander to smooth out any rough spots and remove any excess wood filler.
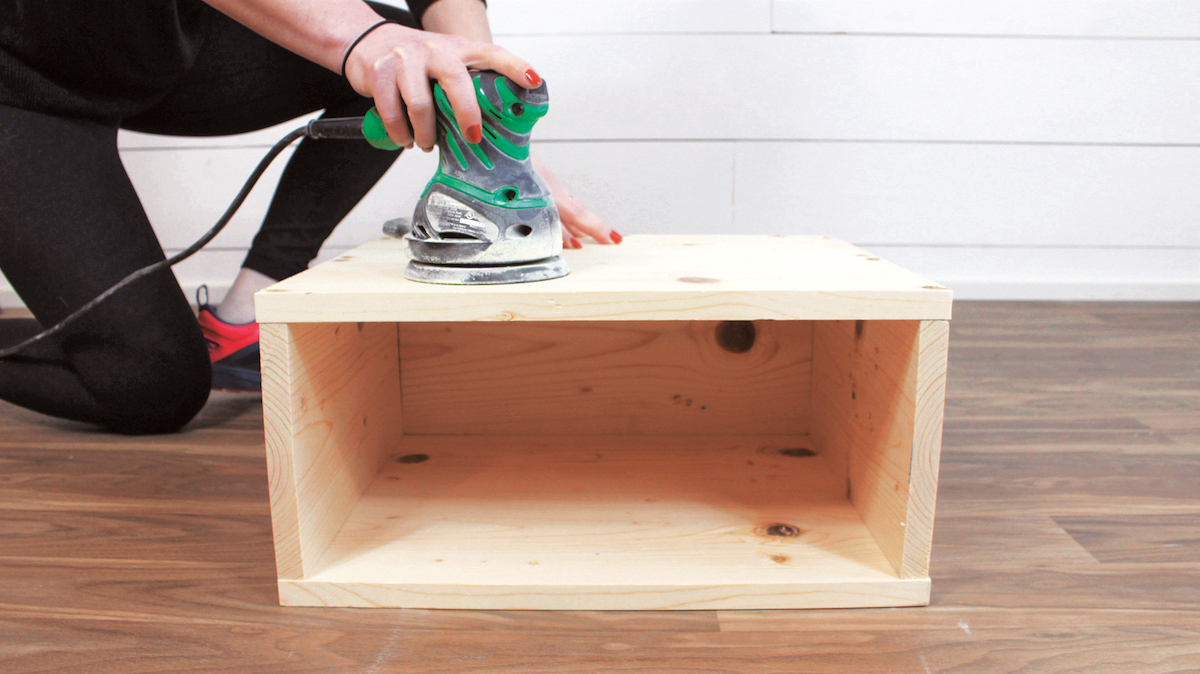
STEP 8
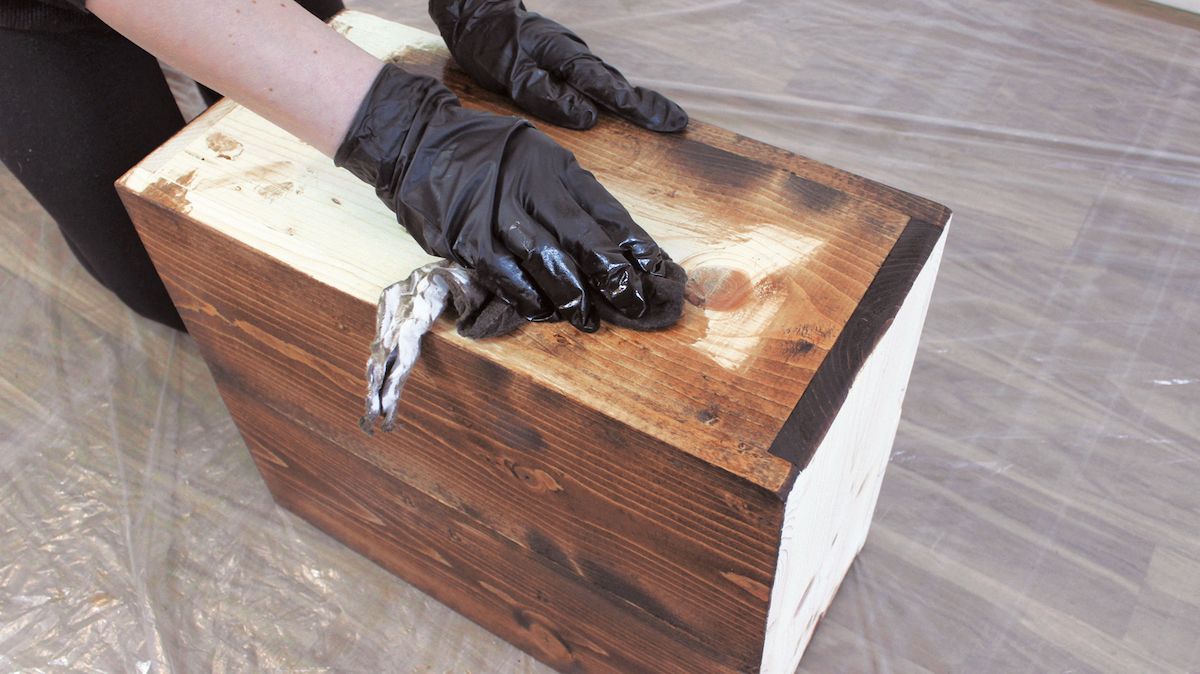
Unroll a drop cloth, put on some rubber gloves, dip your rag in the stain, and apply a coat to your framework. Stain the round taper legs as well. Once the stain dries, take your brush and apply a coat of polyurethane. Let it dry for the allotted time suggested on your can.
Once it is completely dry, you can dispose of your drop cloth or save it for your next project.
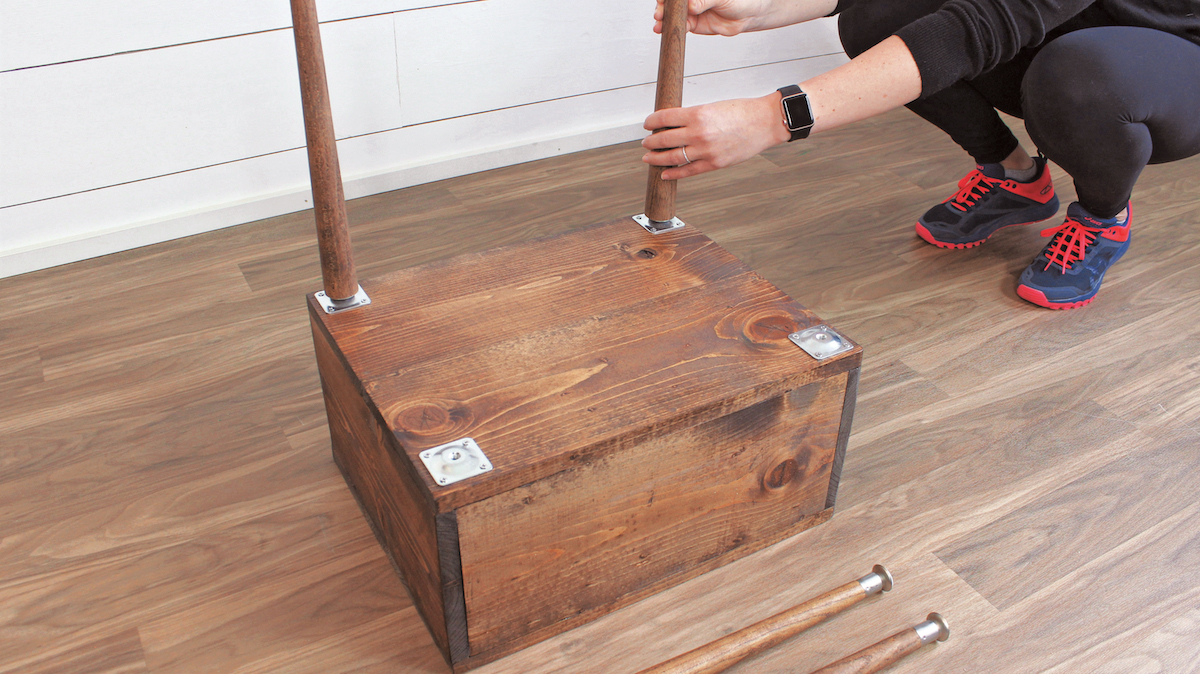
STEP 9
Place a mounting T-plate into each corner on the underside of your framework and attach with the included screws. Now, all that’s left to do is screw the four table legs into each mounting plate. Flip your nightstand onto its legs, and you’re all done!
Place it next to your bed, add an alarm clock, and you’re all ready for the best sleep of your life.
DIY Project Tutorials
Looking for more easy DIY furniture?
Leave a Reply