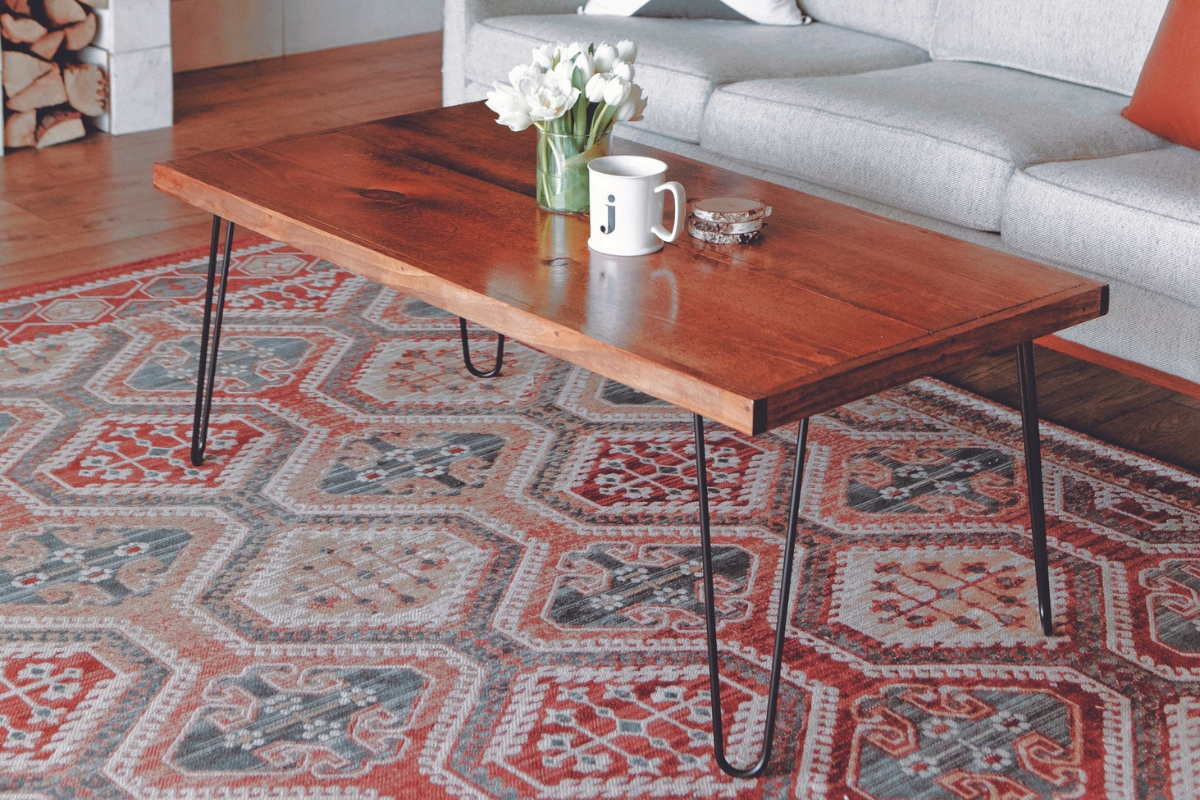
Plans for this DIY Farmhouse Style Coffee Table make building a snap, and you’ll have a homemade coffee table in no time!
A coffee table is a simple piece of furniture, but try living without one. You’re setting your drinks on the floor, you can never find your book in the living room, and everything’s just a little bit messy.
Building a simple DIY coffee table doesn’t have to be hard, and these plans from the book One-Day DIY by JP Strate & Liz Spillman will guide you through each step of the process.

Reprinted with permission from One-Day DIY by JP Strate & Liz Spillman. Page Street Publishing Co. 2020. Photo credit: Kate Becker, JP Strate & Liz Spillman. It has been edited slightly for format and length to fit the web.
URBAN LOFT COFFEE TABLE
We love this coffee table project! It’s a super simple, modern design that looks great with almost any decor! The slim profile and hairpin legs allow this piece to fit well in smaller spaces, while the metal legs tie in perfectly to a lofty, industrial space. Super versatile, right?
We used pine boards for the base and protected them with polyurethane so your coffee table doesn’t end up with coffee stains. Get ready— you’re about to create your next favorite living room piece!
DIMENSIONS: 461⁄2″ l x 24″ w x 171⁄2″H (1.2m x 61cm x 44.5 cm)

Supplies
LUMBER (WE USE STANDARD PINE)
1 x 12, 8′ (2.4 m) long (x2)
1 x 2, 6′ (1.8 m) long (x2)
Polyurethane
4 (16″ [40.6-cm]) hairpin legs with included screws
Tools & Equipment
Tape measure
Pencil
Safety glasses
Miter saw Drill
11⁄2″ (3.8-cm) trim-head screws
Screwdriver or impact driver
Wood filler (to match your stain color)
Sanding block or sander
Drop cloth
Rubber gloves
Rag
Stain
Brush
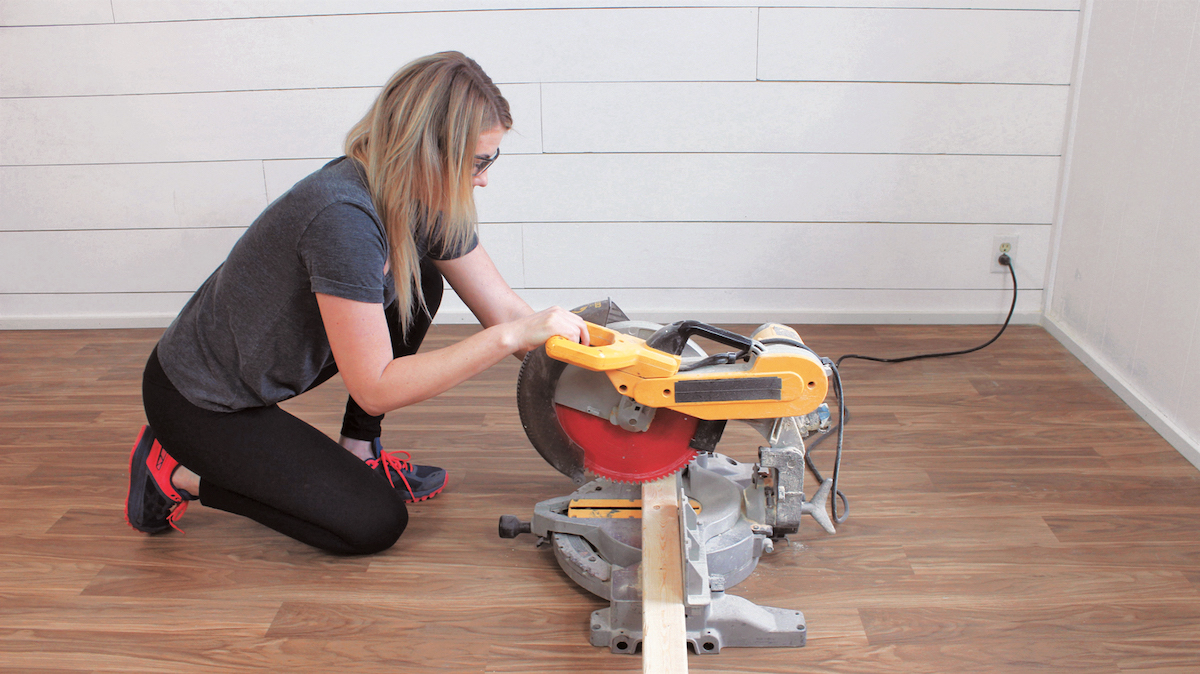
STEP 1
Grab your tape measure and pencil and mark off the cuts of lumber you’ll need for this project as described below. Make sure to put on your safety glasses and use your miter saw to make the necessary cuts. If you don’t have a miter saw, many larger home improvement stores will cut the pieces for you.
Cut the 1 x 12s into two 45″ (114.3-cm)-long pieces and four 221⁄2″ (57.2-cm)-long pieces.
Cut the 1 x 2s into two 461⁄2″ (118.1-cm)-long pieces and two 221⁄2″ (57.2-cm)-long pieces.
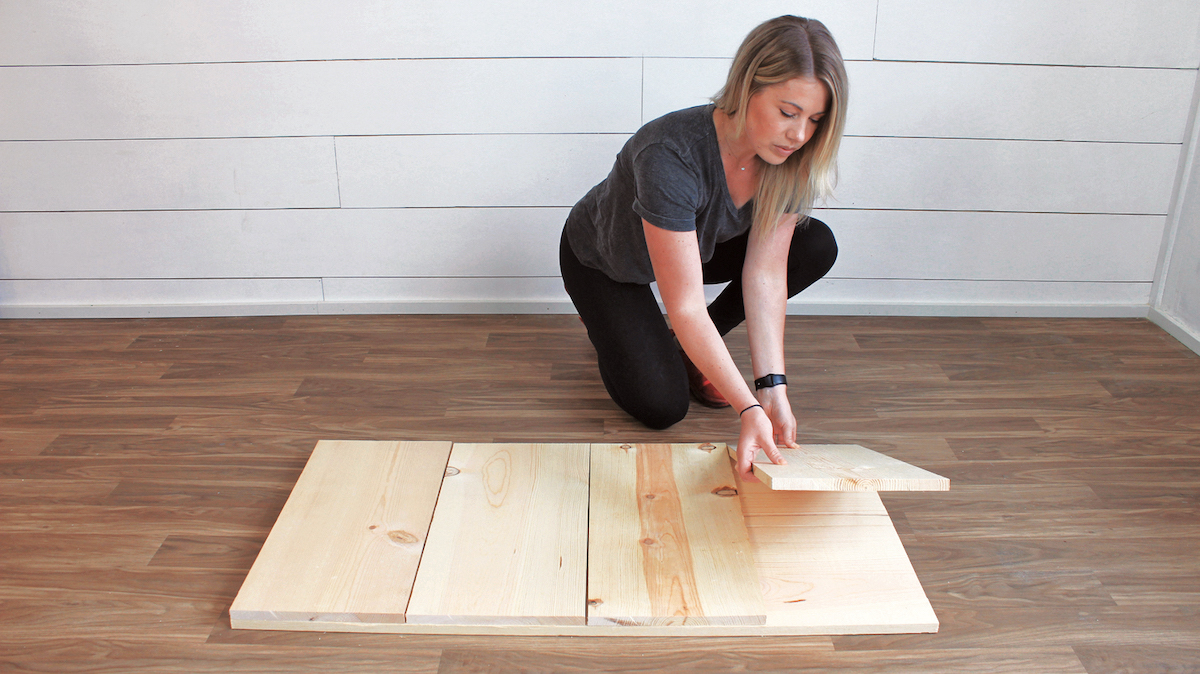
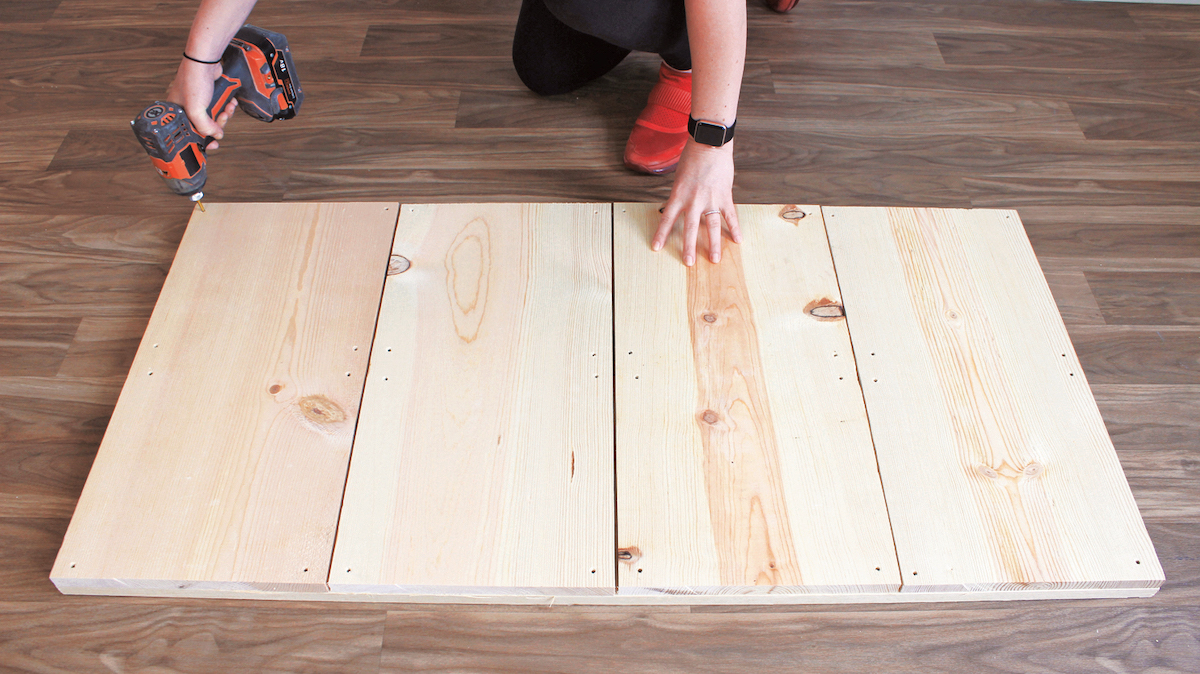
STEP 2
Place your two 45″ (114.3-cm) pieces of 1 x 12 side by side so they touch.
STEP 3
Lay your four 22 1⁄2″ (57.2-cm) pieces of 1 x 12 56 side by side across the top so they are covering the two 45″ (114.3-cm) pieces of 1 x 12 underneath.
STEP 4
Predrill eight holes about 1″ (2.5 cm) deep through each 221⁄2″ (57.2-cm) piece of 1 x 12 (one in each of the four corners and one in the middle of each side of the four sides) so four holes go into each 45″ (114.3-cm) piece of 1 x 12 underneath (thirty-two holes total).
Use your screwdriver or impact driver to secure each 22 1⁄2″ (57.2-cm) piece to each 45″ (114.3-cm) piece underneath with a trim-head screw in each pre-drilled hole.
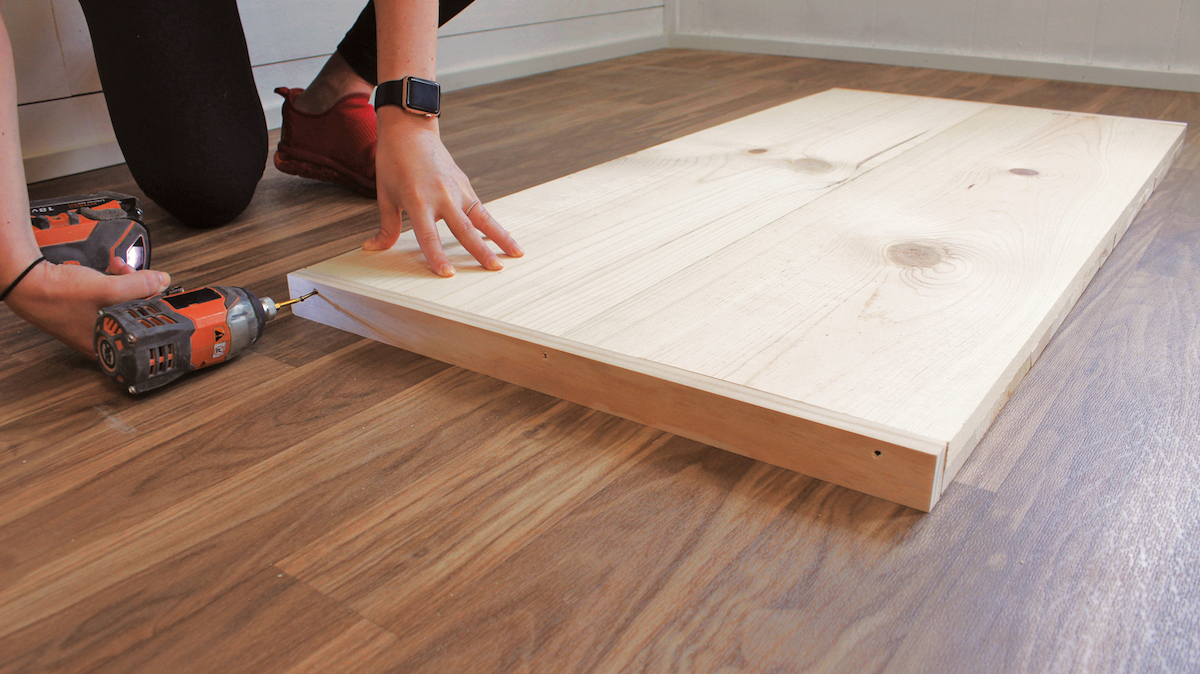
STEP 5
Flip your framework over and place a 221⁄2″ (57.2-cm) piece of 1 x 2 flush against each short end; we’re going to make a border around our coffee table.
Predrill three holes through each 1 x 2 into your framework (one on either end and one in the middle). Secure the 1 x 2s with a trim- head screw in each pre-drilled hole.
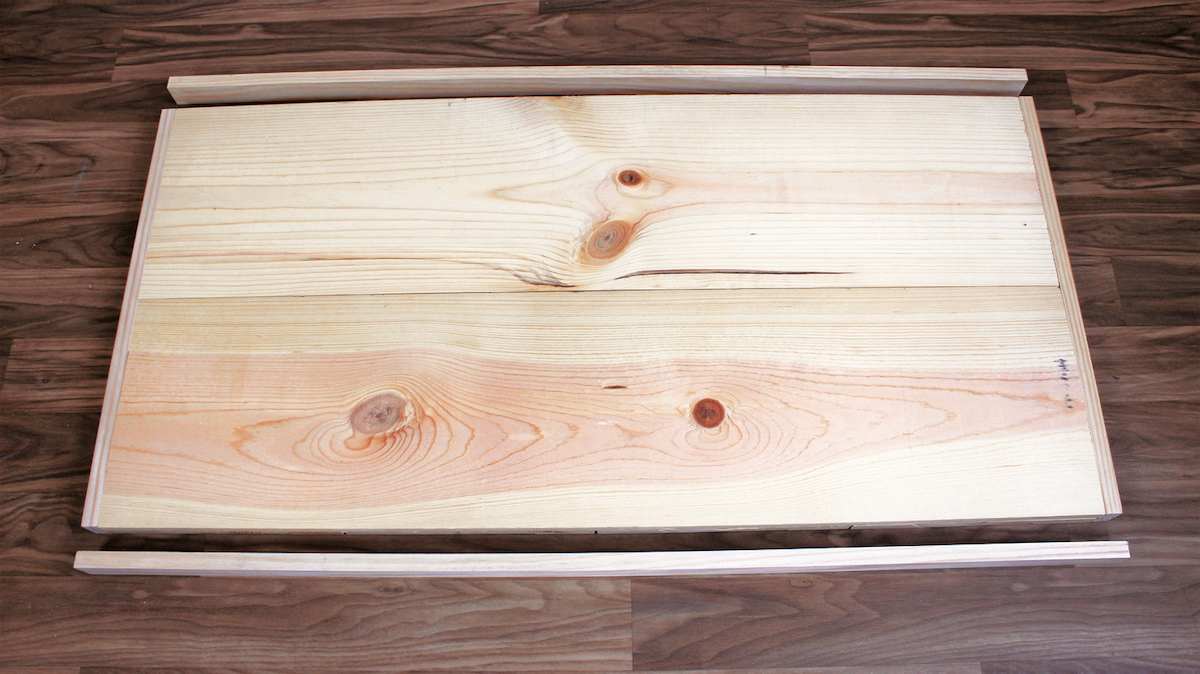
STEP 6
Take your two 461⁄2″ (118.1-cm) pieces of 1 x 2 and place one flush down each long side of your framework.
Predrill five holes through each 1 x 2 into the framework (one on either end, one in the middle, one between each end and the middle). Secure these 1 x 2s with your trim-head screws to complete your border.
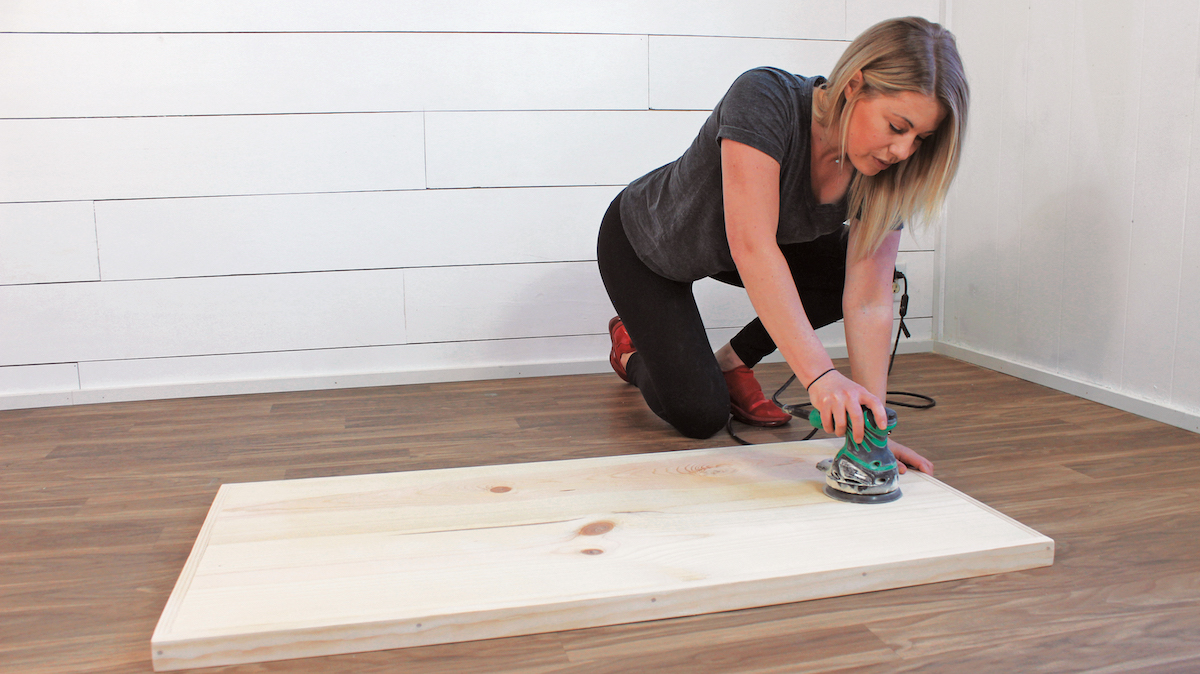
STEP 7
Fill all of your exposed screw holes around your border by applying wood filler with your fingertip.
Once it dries, use your sanding block or sander to smooth out any rough edges and remove any excess wood filler.
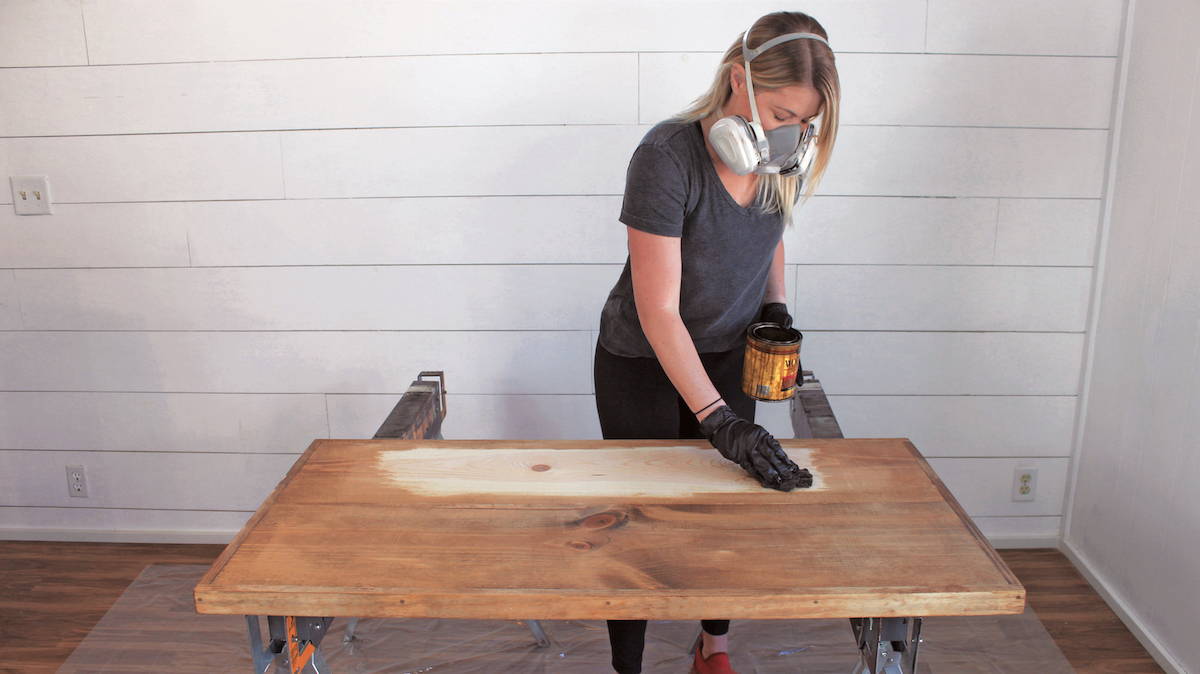
STEP 8
Unroll a drop cloth to protect your floors and put on some rubber gloves to protect your hands (sorry, we’re overly protective). Dip your rag into the stain and give your tabletop an even coating. Wipe away any excess.
Once the stain is dry, take your brush and apply a coat of polyurethane. Watch out for drips!
Let the polyurethane dry for the allotted time suggested on your can.
Once it dries, you can dispose of your drop cloth or save it for your next project.
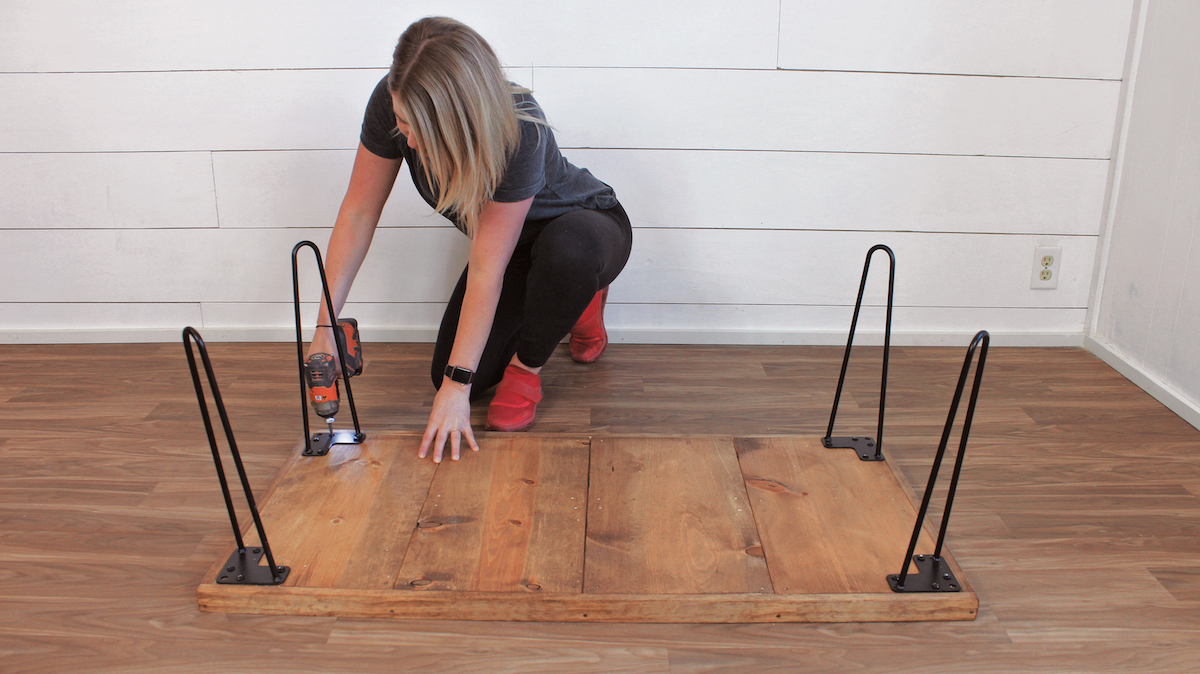
STEP 9
Lay your tabletop so it’s upside down. Place a hairpin leg in each corner just inside your 1 x 2 border. With your pencil, mark the holes where the screws will be. Remove the legs and predrill the marked holes about 1″ (2.5 cm) deep.
Don’t drill too deep; you don’t want the holes coming out the other side.
Place the hairpin legs back and secure them to your framework with the included screws.
STEP 10
Flip this guy over, and whadaya know, you have a new coffee table! Center it over your favorite area rug next to your cozy couch, and watch the compliments come flying in.
DIY Project Tutorials
Looking for more easy DIY furniture?

Leave a Reply